How to Clean Brake Discs
A step-by-step guide to keeping your brake discs sparkling
- Jack your car up, support it on axle stands, and remove the wheels one at a time.
- Undo the caliper bolts, slide off the caliper, then remove the disc bolts to take out the brake disc.
- Use brake cleaner and a rag; wipe gently, avoiding excessive rust scrubbing.
- Inspect discs for heavy pitting, grooves, or damage. Replace if needed.
- Use brake cleaner and a wire brush for tough dirt; take care around the piston seal.
- Work in a well-ventilated space and avoid contact with skin, lungs, or driveways.
- Light rust wears off naturally as you brake; only severe rust may affect performance.
- Clean wheels with soapy water; hose off dirt first, then scrub with a brush.
- Fit brake dust shields to reduce accumulation.
- Get a free brake check from Kwik Fit for peace of mind.
Most UK drivers are happy to keep their cars shiny on the outside and tidy on the inside, but few think about what’s hidden behind their alloy wheels. If you peek through the spokes of your shiny alloys, you might notice your brake discs and calipers looking a little worse for wear. Dust, dirt, and even rust can easily build up over time.
Not only can this spoil the look of your car, but in some cases, it may also affect braking performance. In this guide, we’ll walk you through how to clean your brake discs safely and effectively, how to deal with rust and brake dust, and when it might be best to leave things to the professionals.
Why clean brake discs?
Brake discs in most passenger vehicles are made from cast iron because of its sturdiness and, most importantly, its cost-effectiveness. So, while they’re quite tough, they’re also prone to corrosion and rust.
Every time you use your brakes, tiny particles wear away from the discs and pads, creating a fine dust. Over time, this dust builds up on both the discs and your wheels and can create some subtle (but noticeable) problems, mainly through a sort of “sandpaper” effect where accumulated metal dust can prematurely wear down components.
Cleaning your brake discs helps in three key ways:
- It improves the appearance of your brakes.
- It helps performance – the smoother contact between brake pads and discs means that your brakes can work more effectively.
- It extends your brakes’ lifespan by being able to stop runaway rust and spot early signs of wear before they become a bigger problem.
But, how do you actually clean your brakes? Let’s find out.
Remember, safety first: preparation is key
Before you get started, remember that brakes are a vital safety system. If you don’t feel confident working on them, it’s always best to visit a professional garage and let the experts handle it. If you’re set on tackling it yourself, here’s what you’ll need:
- A car jack and axle stands (never rely on the jack alone)
- A wheel nut wrench
- Brake cleaner spray
- Old rags or microfibre cloths
- A wire brush (for calipers only)
- Gloves, goggles, and a well-ventilated workspace.
Step-by-step: how to clean brake discs
1. Lift the car and remove a wheel
Start by loosening the wheel nuts while the car is still on the ground. Then, jack the car up and support it securely on axle stands. Remove one wheel at a time (this way, the car stays stable and you can focus on each brake individually).
2. Remove the brake caliper
The caliper sits over the disc, so you’ll need to remove it before cleaning. Undo the caliper bolts (usually at the back) and slide it off carefully. It may need a little wiggling. Once it’s loose, set it aside gently; avoid straining the brake hose by hanging it.
3. Take off the brake disc
The disc is normally held in place with a couple of bolts. Remove these, and the disc should slide out. Sometimes it can be a little stuck due to rust but a few taps with a rubber mallet may help loosen it.
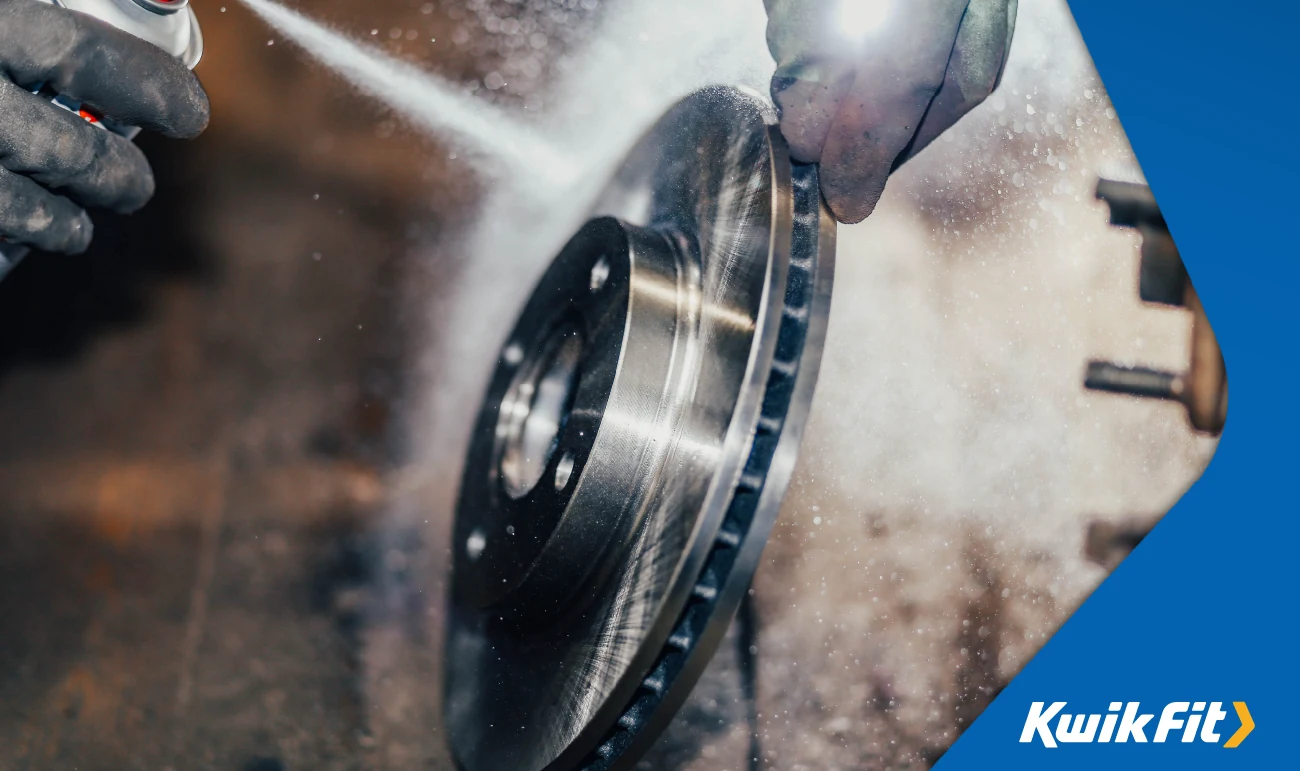
4. Clean the disc
Spray a small amount of brake cleaner onto the surface of the disc. Using a rag or microfibre cloth, wipe away dirt and grime. Avoid using sandpaper or anything overly abrasive, as this could damage the disc. A faint line of surface rust around the rim is normal and nothing to worry about.
5. Inspect for wear
Now that the disc is clean, look for any obvious signs of damage. Deep grooves, cracks, or heavy pitting mean the disc should be replaced. If you’re unsure, this is the time to seek professional advice.
6. Refit the disc and caliper
Once satisfied, refit the disc and tighten the bolts securely. Slide the caliper back into place and secure it with its bolts.
7. Repeat for each wheel
Move around the car, repeating the process until all four discs are clean.
Cleaning brake calipers
While you’re at it, you may want to clean the calipers. These can be sprayed with brake cleaner and gently scrubbed with a wire brush. Be very careful around the piston seal – damaging this could lead to brake fluid leaks and reduced braking efficiency.
How to handle rust on brake discs
It’s common to notice a thin layer of rust on your discs, especially after your car has been parked in damp weather. Thankfully, in most cases, this isn’t a problem. Once you drive and apply the brakes a few times, the rust usually wears away naturally.
However, if rust has built up heavily (for example, if the car hasn’t been driven for weeks) then it may not disappear so easily. In such cases, a professional inspection is best, as rust can weaken the disc if it becomes extensive.
What about brake dust?
Every time you brake, tiny particles of metal and carbon are shed from the pads and discs. This creates brake dust, a dark, powdery substance that clings to your wheels.
While brake dust doesn’t directly affect braking performance, it is abrasive and corrosive, which means it can damage your wheels’ paintwork over time.
How to clean brake dust from your wheels
- Hose down first – rinse away as much loose dust as possible.
- Wash with soapy water – use warm water mixed with washing-up liquid.
- Scrub with a wheel brush – focus on spokes, edges, and crevices.
- Use an old toothbrush – handy for those hard-to-reach spots.
- Rinse and dry – a final hose down followed by a soft cloth ensures a streak-free finish.
Preventing brake dust build-up
Sadly, there’s no way to completely avoid brake dust as it’s just part of how brakes work. However, some drivers use brake dust shields, which fit inside the wheel to reduce how much dust reaches the surface. These can be fitted at home, but results may vary.
Regular wheel cleaning is still the best way to keep your alloys looking fresh.
When to call in the professionals
If you notice squealing, grinding, or vibration when braking; severe rust or grooves on discs; brake warning lights on your dashboard; or if you simply don’t feel confident doing the job yourself, then it’s time to get your brakes checked by experts.
The expert technicians at your local Kwik Fit centre are always on hand for free brake checks, brake repairs, or to help with anything else you might need. Find your nearest Kwik Fit centre here.