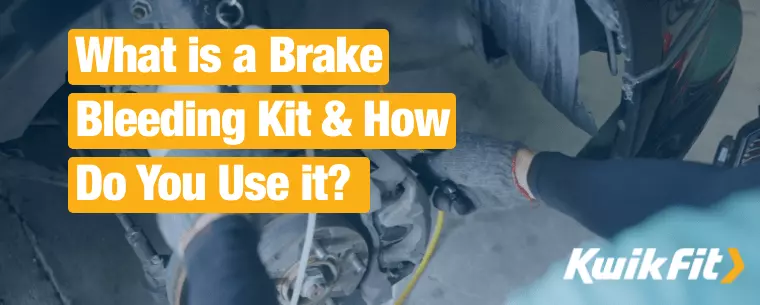
What is a Brake Bleeding Kit & How Do You Use it?
Jack Dreyer | Thursday 22nd June 2023 1:00pm
When was the last time your vehicle had its brake fluid changed?
An essential part of maintaining a healthy brake system, a car’s brake fluid must be changed regularly to remove any debris or dirt from it. If your car’s brake fluid isn’t clean, its effectiveness is reduced significantly, allowing it to absorb water which, over time, may result in brake failure.
Actually ‘bleeding’ your brakes refers to the process by which air bubbles are removed from the fluid — air that, if left in there, can significantly reduce the effectiveness of your braking performance.
So, keeping on top of that fluid change schedule is optimal here if you want to save yourself hassle and pounds. Read on to learn how brake bleeding kits make changing that pesky fluid yourself a breeze.
Bleeding your brakes
Note: Bleeding brakes is not the same as simply topping up your brake fluid by filling up the master cylinder (or brake fluid reservoir) under the bonnet of your car.
When you brake, you press your foot down on the pedal. What happens here is the pedal forces fluid through the brake lines and controls the brakes at the wheel. While this is all well and good, if the fluid has air in it, the pressure applied by you stepping on the pedal will compress the air instead of moving the fluid and your car won’t slow.
Air can get into your brake fluid for any number of reasons including:
When replacing brake callipers
When replacing or repairing hoses
When repairing brake lines
When doing work on the master brake cylinder
In rare cases, there may also be leaks in the brake cylinder or cracks in the hose that may cause fluid to get out and air to get in.
To remove the air, brake ‘bleeding’ is necessary. The older, two-person method involves one person pumping the brake pedal while the other opens and closes it. Nowadays, though, we’ve welcomed the brake bleeding kit with open arms.
What is a brake bleeding kit?
A brake bleeding kit is designed to make the brake fluid change process that much easier. Invented for convenience — and to reduce the amount that drivers would have to get their hands dirty — the brake bleeding kit is an excellent piece of equipment.
What’s included in a brake bleeding kit?
Usually, you can expect to find the following things in one of these handy kits:
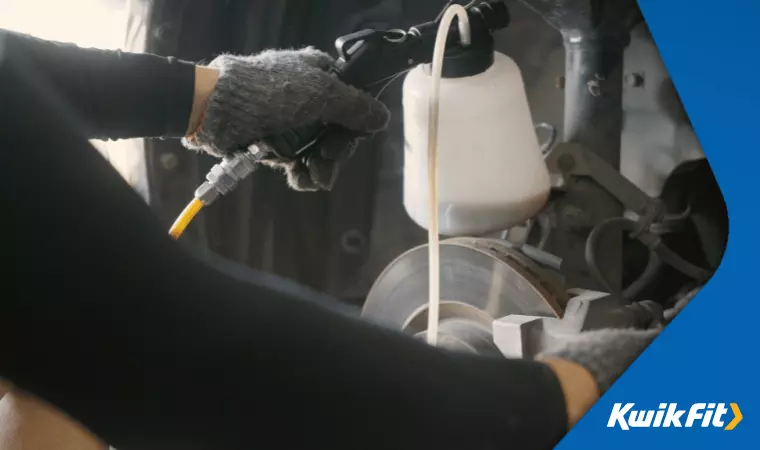
- A pump to draw air out of the brake system. This pump simulates the action of someone manually pumping the brakes.
- A length of tubing or a couple of hoses to decant the fluid from the system. Note: these should be clear so that you can see when the fluid is almost finished draining.
- Plastic adaptors to make sure that your hose system can create a vacuum no matter what size your bleed screw is.
- A container large enough to catch all the fluid that is expelled without overflowing and causing a mess.
How to use a brake bleeding kit
As we’ve said, compared to changing the fluid without a bleeding kit, this process really is so much easier, especially if you opt for the compressor bleeding kit with the pump, eradicating the need for a second person altogether.
That being said, if you’re not used to working on things under the bonnet, this still may seem pretty technical. So, we’ve broken it down into ten simple steps:
1. Raise your car. For this, you’ll need a jack. We’ve written elsewhere about how to operate a jack safely and find the best jacking points on your vehicle. As best practice, start with the wheel furthest away from where your master cylinder is and, for safety, never place any part of your body under a raised car without double-checking the stability of the jacks.
2. Decide on brake bleeding order. If your car is rear-wheel drive, you should start with the back rear tyre, then the back left, then the front right – finishing with front left. If your car is front-wheel drive, the bleeding should be done in a diagonal sequence.
3. Remove the wheels. This step requires you to use a lug wrench to remove all of the lug nuts (keep these safe). If these are slightly stiff or rusty you can always use some lubricant to help. Once the wheels are off, the brake calipers should be nice and exposed.
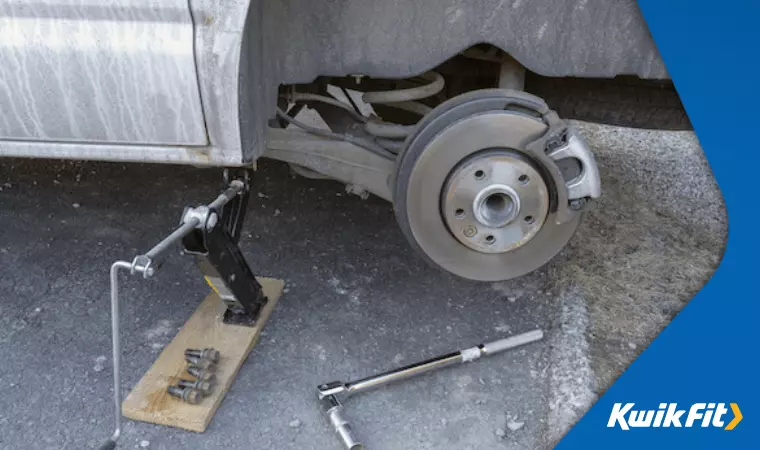
4. Remove bleeder screws & any debris. Looking on the back of the brake calliper, you should find the bleed screw — this has a shiny metal tip and a hexagon-shaped base for a wrench to fit around. Clean the area around the screw (it may well be a bit greasy).
5. Top up your brake fluid. At this point, make sure your brake fluid reservoir does have enough fluid in it, just above the ‘full’ line as levels are likely to drop when bleeding.
6. Assemble the kit. While we’d obviously advise you to follow the instructions for your specific kit, here, generally speaking, the steps are quite universal. The hoses both attach to the container (one on the inlet and one on the outlet) at one end. With the other ends, place one over the pump and one over the brake bleeder screw.
You should now have yourself a nice little circuit going.
7. Tighten for pressure. The idea with this circuit is that it is air tight enough to create negative pressure with the pump. Sometimes, it takes a few tweaks to get right as the brake bleeder screw can be smaller than the hose end. If this is the case, the kit should come with a plastic adaptor to lessen the hose end.
To test whether the seal you’ve made is right, pump to -10InHg (Inch of Mercury, the most common unit of measurement in brake bleeding kits). If the gauge is able to hold that number without dropping, congratulations!
8. Brake bleeding time. First, make a vacuum. You can do this by pumping to -25InHg with the bleeding screw closed. Now, take your wrench and slowly turn the screw anticlockwise. Keeping an eye on the pressure gauge, it should drop as the bubble-filled brake fluid is sucked into the hose. When it drops to -5InHg, it is time to close the screw and re-make the vacuum by pumping to -25InHg again.
Repeat this process until you have run out of bubbles, but make sure the container catching the fluid doesn’t overflow and spill as brake fluid is caustic and can cause harm.
9. Repeat for all brakes. Work your way around the car in the order that you removed your wheels in for consistency.
10. Test and tidy. Once you are satisfied with the quality of your brake fluid, it’s time to do a little test. Apply your foot to the brake pedal. Does it feel spongy? Does it feel malleable or too easy to push down? No? Then you’ve successfully bled your brakes. All that’s left to do is safely put your wheels back on, tidy up any spillages or debris, disassemble the kit, and lower the car.
If that all still sounds quite complicated, not to worry. Our team of qualified technicians are on hand to put your brakes to rights whenever you need them. So, to save yourself the trouble, book in for a brake fluid change today.
Disposing of brake fluid
As a side note, it is essential that you dispose of brake fluid correctly as it is a substance that can cause harm to children, pets, and the environment. While there are a series of ‘at home’ disposal options available, we'd recommend taking it to a recycling centre, a mechanic, or looking online at what your local council does and does not recycle from domestic pickup.
Don’t let brake issues slow you down …
Or, rather, keep on top of any brake health issues to make sure that you can, in fact, slow down effectively when you need to.
If you have any concerns about the performance of your brakes, get in touch with your local Kwik Fit centre and book a free brake check appointment today.
In the meantime, keep up with the latest motoring news and advice on the Kwik Fit blog.
Any facts, figures and prices shown in our blog articles are correct at time of publication.
Featured Articles
Is it Illegal to Drive With One Headlight?
Saturday 19th July 2025
Wondering if it’s illegal to drive with one headlight? Learn about the safety risks and penalties of illegal blown bulbs and why you should fix them promptly.
Air Con in EVs & Hybrids: Experts Answer Your Questions
Monday 30th June 2025
Does air con drain EV batteries? Can you use the air con while charging an electric car? Find out the answers to these questions & more from Kwik Fit’s experts.
Why Is Your Car Making a Noise? Fixes & Tips
Friday 13th June 2025
When your car starts making unexpected noises, it can certainly be quite disconcerting; it may be nothing to worry about, but here’s what you need to know.